The great thing about OpenSim? As much low-cost — or even free — land as you want.
The bad thing? You have to have terrains for all that land. Sure, you can go in-world and use the terrain editing tools, but those take forever. And, if you’re anything like me, the results are lousy. The beaches don’t look beachy. The mountains don’t look mountainy.
Or you can upload terrain files that are already out there, but those are usually for single-region islands. Not a great fit for, say, a 16-sim Kitely megaregion.
There are ways to make your own terrains, using specialized software, but I needed a way to quickly generate megaregion terrains from existing terrains using only the tools I had at my disposal — Microsoft Paint, GIMP, and the OpenSim server. For OpenSim, I’m running the New World Studio, which is awesome. But really, I’m not very good at using GIMP, and the layers just confuse me.
So here’s the problem. I don’t have any software that supports the RAW format — and that’s the one that you need to upload terrains using the Second Life and OpenSim viewers. Linda Kellie’s terrains are in the PNG format, which is nice and easy and universally supported, but you can only upload those terrains using the OpenSim server console. So, first, I have to make the terrains bigger. And, second, in order to use them inside Kitely or any other world where you don’t have access to the OpenSim server console, they need to be in RAW format.
Here’s how I did it. If you have a more streamlined way, please let me know!
One: Find your base terrains
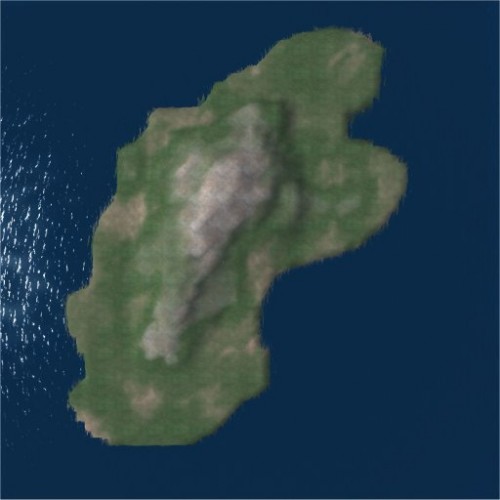
Say you want a four-region terrain that’s one big island. You can start with this terrain by Linda Kellie:

The colorful picture above is just how the island will look in-world. The terrain file itself is black and white, with the white areas being the mountain peaks and the black areas the ocean bottom.
Ideally, your terrain file will be in PNG or some other non-RAW format. If it’s in RAW format, you’ll have to covert it before editing it, and I don’t know how to do that. I’ve read online that some camera software will do the conversion, but this doesn’t help me much since I don’t have any.
Two: Stretch it out
Okay, now if you’re lucky enough to find a terrain in PNG format, open it with Paint or your favorite easy-to-use image editor.
Rotate the island to get it facing the way you want, then use the resize command to stretch it.
A single region terrain is 256 by 256 pixels. For a two-by-two four-region terrain, you’ll want 512 by 512 pixels. For a three-by-three nine-region terrain, you’ll want … 768 by 768 pixels. (Had to use a calculator there.) For a four-by-four 16-region terrain, you’ll need to stretch it to 1,024 by 1,024 pixels.
Three: Chop it up
This next step is tricky. You want to cut your terrain up into pieces, but do it really evenly. Maybe there are programs out there that can do this automatically. (Please let me know!)
But since I’m barely able to use something as simple as Paint, I use the properties command to crop the image.
So, say, I’ve stretched it out to 512 by 512 pixels. By using the “Properties” function (under the drop-down File menu), I can crop the image to a nice and even 256 by 256 pixels, exactly. That gives me my top left corner of the terrain. I save it, naming it something like — island-top-left.png — and then use the Undo button to get back to my single big terrain.
Now for the other corners. Here’s my trick: I rotate the whole image until the corner I want is in the top-left. I use “Properties” to chop it down to 256 by 256. I rotate it back an equal number of rotations, and save it. So, for the bottom-right corner, I do two 90-degree rotations to the right, chop it down, then do two 90-degree rotations to the left, then save it.
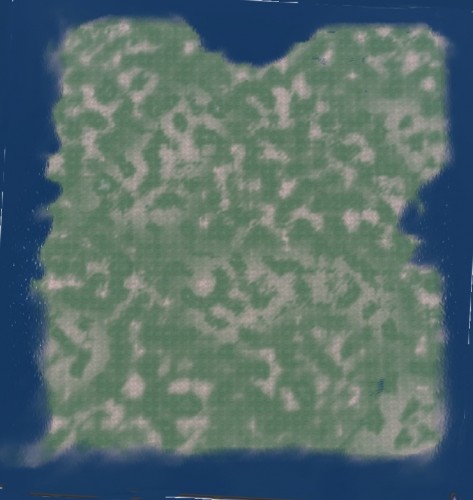
Ta da! My single region PNG terrain is now a four-region megaterrain.
To turn it into a four-by-four 16-region megaterrain I’d chop it into four pieces first, using the above technique, then chop each of those four pieces into another four pieces.
Making a three-by-three nine-region terrain is also possible using the same method, though it involves a lot more rotating. It made my head spin.
For example, to get the middle piece out, you’d take your 768 by 768 stretched terrain, then chop it down to 512 by 512. Now the middle piece is in the bottom right. Rotate twice, chop to 256 by 256, and rotate back — and you’ve got your middle piece.
You can get to any piece you want by rotating, chopping, rotating, and chopping some more. Be careful to keep track of your rotations, and name them appropriately when you save them.
Four: Upload to OpenSim
The way I did this was first I copied all the terrain files to the folder containing OpenSim.exe. In my case, I opened the NWS 2 folder, then the “apps” folder, then the “OpenSim” folder, then something called “2012001.” If you are using a Diva Distro, it will be in the “bin” folder.
By copying the terrain files over, I avoided the annoyance of  having to type out the whole file path each time I uploaded or saved an OAR.
If you’re running New World Studio, before you hit the “Start virtual world” button, first click on the “World” tab and make sure that “Show OpenSim console at startup” is enabled. Then you can go back to the “Quick start” tab and start OpenSim.
The Diva Distro, Sim-on-a-Stick and the standard distribution of OpenSim all show you the console by default.
It will take a couple of minutes for everything to load, and you’ll see a bunch of gobbledygood in the OpenSim console window. Once it’s done, first, make sure that there’s nothing there that you can’t over-write. If you’ve already got stuff built in your OpenSim, then you’ll want to create a new region where you can upload your terrain.
Here are the commands:
create region region-name
change region region-name
The “create region” command will prompt you for some stuff, like region coordinates. It doesn’t matter what you put there, but you might want to pick coordinates close to your existing regions.
The “change region” command will make the new region your active region, so that the next console commands will just affect that particular region.
Now you can upload and re-save your terrains. So, for example, if you’re uploading the top left corner:
terrain load island-top-left.png
terrain save island-top-left.raw
After you type in the “terrain load” command, you will have to wait a few seconds for the terrain to actually load, then the server will give you a confirmation message. I had a copy of Imprudence running, so I could also see that the terrain was loading okay, just to double-check.
I did this for all my PNG files to convert them to RAW. In the case of my 16-region terrain, I had to do this 16 times. But overall, it went pretty quickly.
Again, if you know of a utility that will do the format conversion, please let me know!
If you happen to have server access to your OpenSim regions, then you can just use the “terrain load” command to load PNG terrain files, and you don’t have to worry about converting them to RAW format. Just use the “change region” command to go from region to region, and upload your terrains. The only hard part will be uploading the right terrains to the right regions — the first time I did this, I had the various corners confused and it wound up looking like a jumbled jig saw puzzle.
There is also a terrain load-tile command which loads a terrain section that is part of a larger file. You can read about it here with some instructions for how to use it by Garmin Kawa here. This would allow you to skip the part where you slice up the image into pieces.
Five: Upload to Kitely or other grid
If you’re using the terrains on Kitely, Second Life, or some other grid that doesn’t allow you console access to OpenSim — which pretty much is any closed commercial grid — then you will need to use a viewer to upload your new RAW files.
I normally use Firestorm these days, but I had to switch to Imprudence for uploading the terrains since Firestorm kept crashing. They may have fixed that problem since I tried this last, however.
In Imprudence, the terrain upload function is under World-Region/Estate-Terrain tab. This is where you upload the RAW file.
Tip: close out this dialog box before you teleport from one region to another. Otherwise, you’ll be replacing the terrain on the region where you were previously. I spent about half an hour replacing the terrain in the first region over and over again before I figured this out!
Six: Share with others
Now that you’ve got all those RAW files, please be nice and share them with everyone else, especially if you used one of the public, Creative Commons-licensed terrains as your starting point. After all, there’s no point in making everyone else do all that rotating-cropping-and-converting if you’ve already done it.
If you’re in Kitely, you can also save the entire megaregion as a single OAR file. Please do so!
A good place to share everything is on OpenSim Creations. For example, I shared my nine-region OAR and individual terrain files, and my 16-region OAR and files.

If you post the files on your own blog, or on another site, please add a link in the comments, so other folks will know where to find it. And don’t forget to state your license terms. I recommend the “Enerific” license, which allows people to do whatever they want with the content, including using it for commercial purposes, without having to give credit to the original creator.
My reasoning is that I want as many people as possible to do stuff in OpenSim, and having lots of no-restrictions terrains and OARs available will make that possible. Plus, keeping track of license restrictions is a pain, and I’d rather save more-restrictive licenses for content where I put in more work than just rotating, cropping, and converting file types.
Advanced: Create interlocking pieces
If you want to do even more to make it easier for folks to create large terrains in OpenSim, you can create some new terrains that fit in next to each other, edge to edge, that people can assemble into large landscapes.
For example, you can have a bunch of terrains that are all exactly flat on the outside edges — good for interior regions — that have lakes or mountains in the middle.
Perfectly flat regions (console command terrain fill 21) Â are great for building corporate and school campuses because it’s easy to move buildings, roads and landscaping elements on a flat surface. With a hilly terrain, you can’t just move a building over a few feet — it will either go into the ground, or hang in the air. But if you have a lot of land to play with, it’s nice to have some mountains or lakes for visual interest.
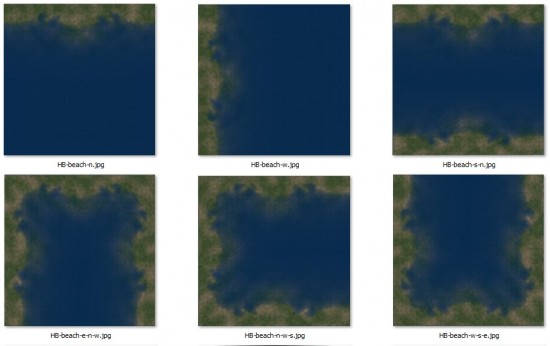
You can also create interlocking beachfront terrains, like I did here:

I created about a dozen different beach front terrains, and uploaded the PNG files to OpenSim Creations. Â The edges all fit together, and all the land edges are flat, so you can have them next to standard flat regions.
Kitely: No plans to improve terrain management
Meanwhile, if you’re waiting for Kitely to add tools to make it easier to upload and manage terrains — don’t hold your breath.

“We have no such plans,” Kitely CEO Ilan Tochner told Hypergrid Business. “I think OAR files are the way to go when it comes to transferring builds from one OpenSim installation to another. That is one of the reasons we extended the capabilities of the OAR format to support saving multi-region and megaregion builds.”
Tochner added that he hopes that other developers will take up the issue, however.
“I hope that the OpenSim-focused third-party viewer developers will add megaregion support to viewers so that people will just be able to upload one file for the entire megaregion’s terrain,” he said. “That would save people a lot of time and would be useful for cases when OAR uploads are irrelevant, for example, when people generate the terrain in some external program and currently need to cut it into region-sized pieces.”
- OSgrid back online after extended maintenance - April 16, 2025
- Analysts predict drop in headset sales this year - March 25, 2025
- OSgrid enters immediate long-term maintenance - March 5, 2025
