For those interested in learning how to work with mesh objects, there’s a new series of Blender tutorials available online from Ontario-based retired artist Aine Caoimhe — also known as Mata Hari in-world.
Blender is a free but powerful 3D modeling and animation program available for download here. It supports the Collada-format mesh exports used in Second Life and OpenSim, so it’s especially popular with designers there.
Mesh looks good and can have a lower impact on your region than traditional prim-based objects. Plus, if you sell your content in-world or through the Kitely Market, you might have noticed that the word “mesh” attracts customers because some people will judge the content as newer and higher quality.
First Step:Â Virgins and Mice Tutorial
Virgins and Mice isn’t actually the first tutorial that Caoimhe has posted, but it’s the one that you should start out with if you’ve never used Blender before — or if you opened it up and gave up immediately.
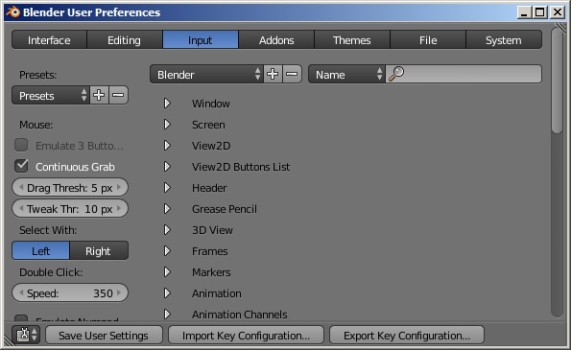
Once you’ve downloaded Blender and installed it, it takes about 10 seconds to do. Really! And, according to Caoimhe, it will make your Blender experience infinitely easier from then on.

One other thing I did to make working with Blender easier for me is changing the interface colors. It’s under File>User Preferences. Click the “Theme” tab and look through the presets. I picked the “Blender 24X” theme because the darker ones bother me.
Second Step: Baby Steps tutorials
The next set of tutorial you should work through are Baby Steps, Baby Steps II, and Baby Steps III.
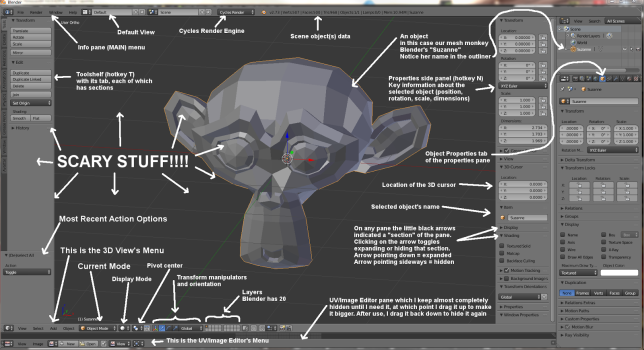
The first one gives you a basic overview of the tool bars and tells you how to zoom around and look at your objects from different angles.

It also shows you how to create the monkey head shown above. It looks difficult, but actually it’s built into Blender and takes just one click.
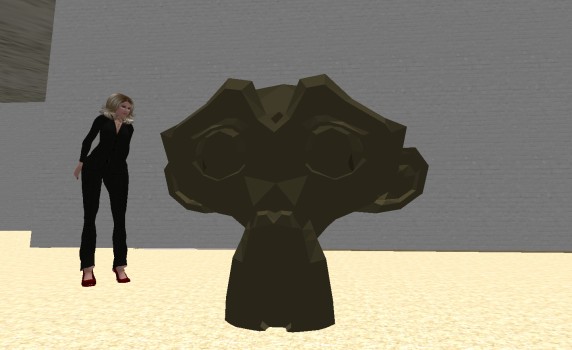
After I created the monkey head, I took a break from the tutorial and exported it into OpenSim:
- In Blender, go to File>Export>Collada then choose the folder and file name. Then click “Export Collada” at top right.
- In OpenSim, go to Build>Upload>Mesh Model then choose the file. Click on “Calculate weights & fee” at bottom left of the Upload Model dialog window, then click on “Upload.” The mesh is now in your inventory.

Since I hadn’t gotten as far as learning how to do textures in Blender, the monkey head arrived in a solid gray color, which I replaced with bronze using standard OpenSim texturing tools.
There you go. Your first mesh build, created in Blender, and imported into OpenSim, in a matter of minutes.
The rest of the tutorials in this section are mostly for your reference and background knowledge, and will become more useful later.
The second one continues with more details about what all the tool bars and property windows offer and how to select one object or a group of objects.
This is a long one, with a lot of information — scan through it, then bookmark it to come back to later whenever you need to find our more about the interface.
The third one talks about a few different ways to look at objects, like the texture view, or the wireframe view, and how layers work in Blender.
It also talks about how to move, stretch, and rotate objects. This works almost but not quite the same way as in OpenSim, plus with a whole lot more options.
Again, there’s a lot of information here, so well worth bookmarking for later reference.
Other tutorials you should glance at then save for future reference are The Essential Hotkeys, which covers the keyboard shortcuts you most need to know, and Context Part I, which talks about geometry and frames of reference.
Further lessons
More beginner tutorials from Aine Caoimhe:
- Fun With Arrays – how to make pretty patterns in Blender
- More Fun With Arrays – how to make both a plain and spiral staircase
- Arrays and Chains – how to make a simple chain
- Chains Revisited – how to make jewelry chain
- Screwing Around – how to make a simple vase
- Screwing Up – Â how to make a spiral ramp with railings
Second Life resources:
- Hell House Studios: Creating mesh text for Second Life using Blender — a nice, non-video tutorial using the latest 2.72 version of  Blender. I recommend this as your next tutorial. It’s nicely self-contained, and you can create something immediately useful in a very short time.
- Second Life wiki: Exporting a mesh from Blender — focused on making clothing, and talks about bones, and rigging, and using the Avastar Blender add-on which costs $27.
- Metaverse tutorials: Blender — a series of video tutorials that covers creating and rigging clothing and other topics.
General Blender resources:
- Tufts University video course:Â Blender 3D Design Course — nicely organized and useful for those who prefer their tutorials in video form, but uses the older Blender 2.60 interface.
- Blender Cookie: Blender Basics – Introduction for Beginners — another free video course, covering the very basics.
- Blender Cookie:Â Introduction to Texturing with Cycles in Blender — also free, and “cycles” is the recommended mode for OpenSim mesh creation in Blender.
- Blender Cookie:Â Mesh Modeling Fundamentals in Blender — another useful course, but part of the the site’s premium section, which can be accessed for $18 a month.
- Terra Melior: Speed Modelling: Hair Mesh in Blender — a hypnotic video of an artist making a hairstyle from scratch in Blender, useful for anyone who’s ever thought that they were being overcharged for mesh hair and could do it themselves.
- WikiBooks:Â Blender 3D: Noob to Pro — a free online manual for Blender, strong on the introductory materials.
- Amazon: 10 Minute Blender: Learn to create a 3D model with Blender in under 10 minutes  — ebook, available for download for $0.99.
- Amazon: Blender for Dummies — coming out at the end of April, available for preorder now for $28.
- Analysts predict drop in headset sales this year - March 25, 2025
- OSgrid enters immediate long-term maintenance - March 5, 2025
- OSgrid wiping its database on March 21: You have five weeks to save your stuff - February 15, 2025
